

We get the same call two or three times a month: a homeowner bought a DIY glass restoration kit, spent a Saturday on a shower door, and wants to know whether they made it better or worse. The answer almost always comes down to one judgement made before anyone touched the glass — whether that damage was the kind a kit takes out, or the kind that needs a trained hand and someone who has ruined enough practice panels to know when to stop.
Start with the fingernail test
Before you buy anything, do this. Clean the glass and dry it completely — soap film and mineral haze both imitate damage. Then run a fingernail across the mark at a right angle, lightly, and trust what your finger tells you over what your eye does.
If the nail glides straight over and you feel nothing, the mark is on the surface: mineral deposit, hard water staining, soap residue, light etching, wiper marks, or a fine scratch. That is the family of damage a kit handles well.
If the nail catches and drops into the line, that scratch has depth. Correcting it means removing glass evenly across the whole area until the surface is flat again, and how much can safely come off depends on thickness, glass type, and whether the panel is tempered. That is not a beginner’s call.
Do the test in raking light, too — glass hides its faults when you look straight through it and confesses them sideways.
What a DIY glass restoration kit can realistically fix
Plenty of real damage is genuinely within reach for a careful homeowner:
- Hard water spots and mineral staining. The most common job we see, and the most forgiving. It sits on the surface.
- Haze and cloudiness on shower glass that no cleaner touches any more.
- Wiper marks and light scuffs — the arc-shaped dulling on a windshield or a patio slider.
- Fine scratches your nail rides over: cleaning grit, a ring, a dog’s claws, a careless squeegee.
- One panel, flat, at chest height. A shower door you can reach from the bathroom floor is a good first project. A second-storey window over a stairwell is not, and that has nothing to do with the glass.
Two rules separate a clear panel from a cloudy one: never skip the finishing stage, and never work dry. Every coarse stage leaves marks of its own, and the finer stages exist to erase them — stopping halfway is exactly how one scratch becomes a haze field.
What is in the DIY kit at $279 — and what each part does
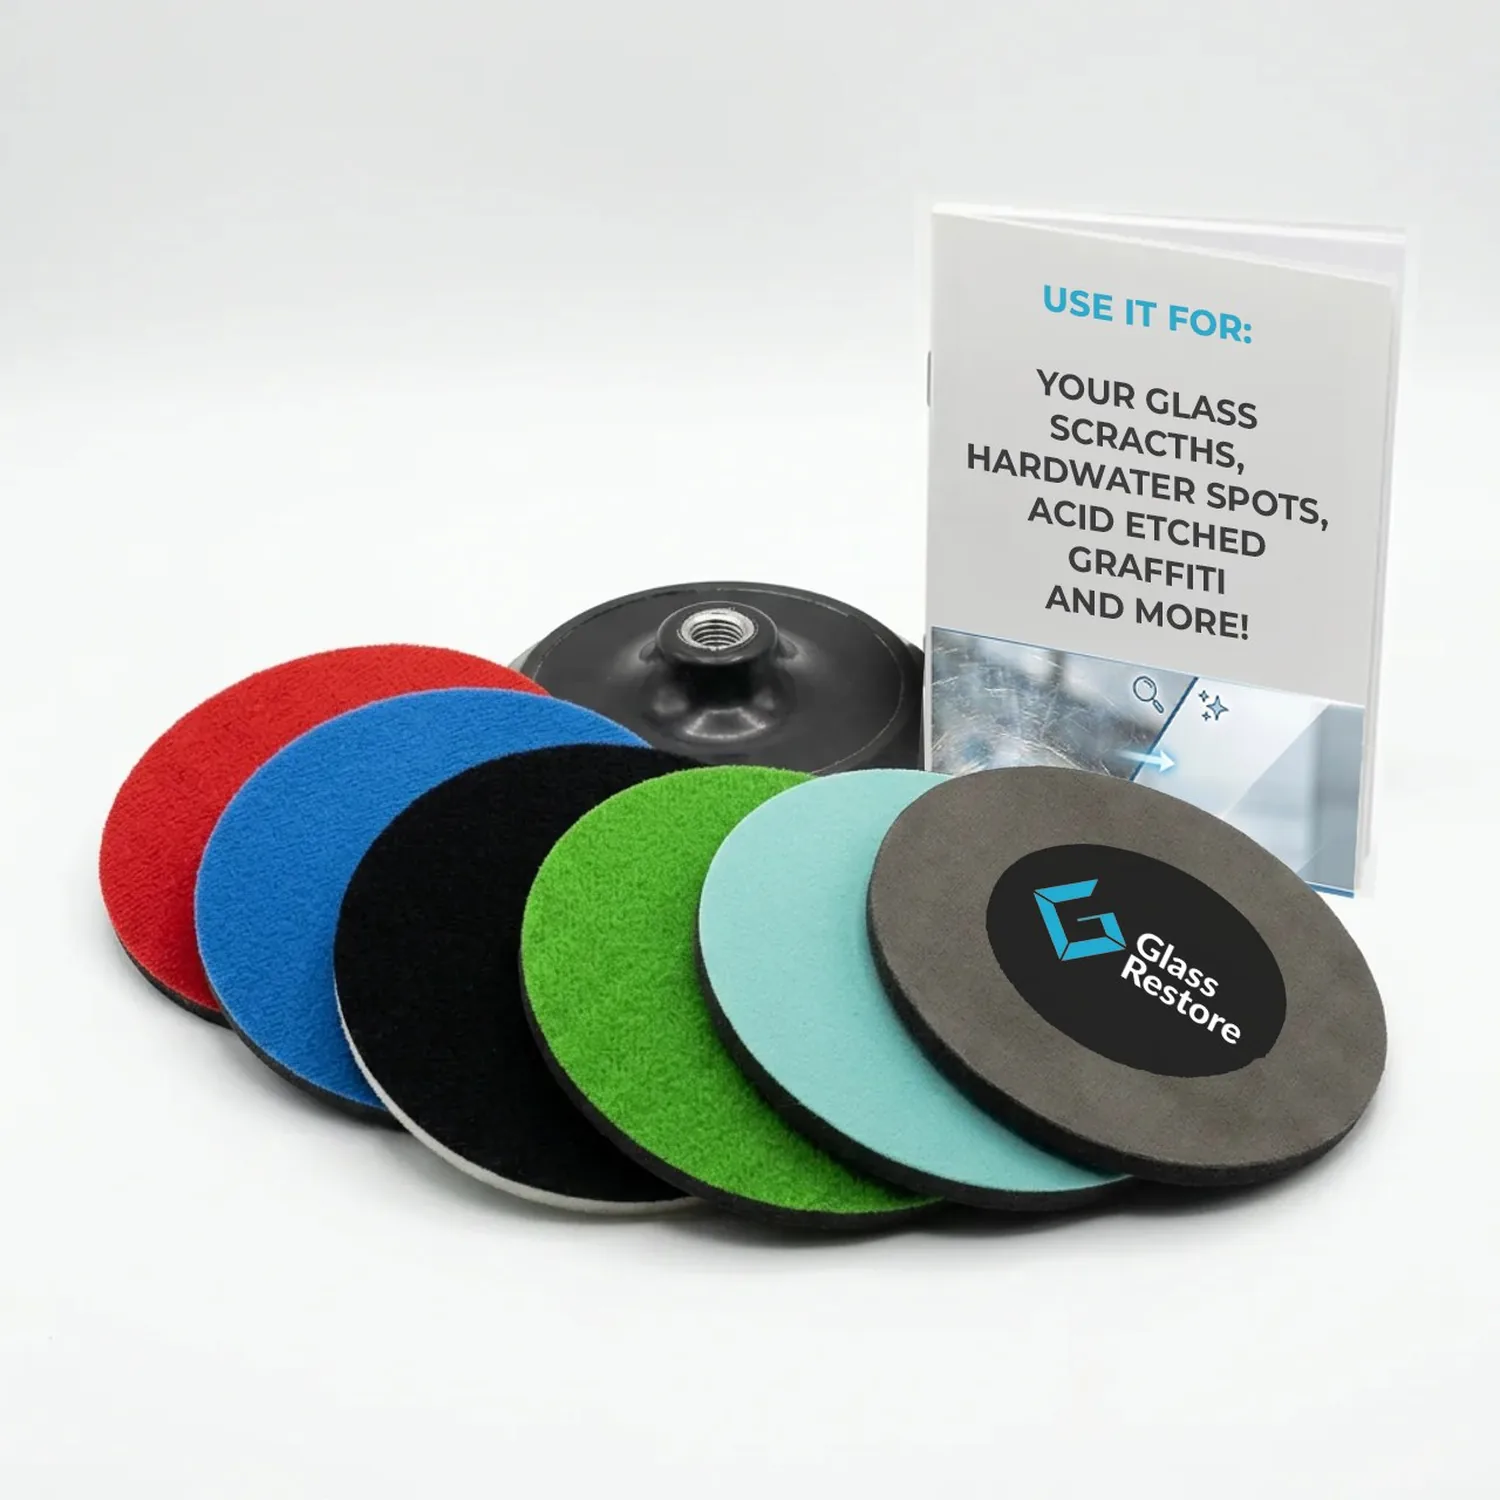
The DIY glass restoration kit ($279) is the same pad system our crews run in the field, packed for one person and their own glass. What the pieces are actually for:
- The Step pads. A numbered progression from aggressive cut down to fine refinement. You do not start every job at Step 1 — pick a starting Step by the damage, test a small area, then run every remaining Step in order. Deep scratches and acid etching start coarse; hard water spots and haze start much further down.
- The Step 6 clarity pads. The finish. They carry built-in polishing compound and take out the fog the correction stages leave behind. Spray clean water on the pad and keep the glass lightly wet — Step 6 is never used dry.
- The 5-inch backing pad. Mounts the system to your machine.
- The Flat-Control Interface Pad. Sits between the backing pad and the working pad, keeping the machine flat, softening edge bite and preventing the uneven contact that leaves a shallow lens in the glass. The least exciting item in the box, and the one that saves the most panels.
What is not in the box: the machine. You supply a variable-speed polisher holding roughly 2,500–3,500 RPM. An angle grinder will not do — it spins far too fast, and heat is what cracks glass and burns pads. Keep the tool flat, keep it moving, keep the surface wet.
If you are running paid work — storefronts, acid-etched tags, back-to-back jobs — the Commercial kit ($499) is the one built for that: more pads across every Step, a Step 7 felt pad, liquid compound, and a duffle to carry it.

Four jobs to leave alone without training
Deep scratches your nail catches on. Fixing them means taking the surrounding surface down to meet the bottom of the scratch. Judge that wrong on tempered glass and you get distortion you cannot polish away — or worse.
Acid-etched graffiti. Tags bite into the glass, and rarely evenly. The correction has to come out flat across the whole tag, and reading depth over a large uneven area is a skill, not a machine setting.
Coated glass. Low-E, anti-spot and privacy coatings live on the surface, not inside it. Any abrasive removes them in patches, and nothing brings a coating back. Learn what you are standing in front of before you power up.
Big, high, or expensive panels. Large storefront glass, frameless shower doors, anything on a ladder. Surface area alone means one small technique error repeats across the whole panel — see what the work looks like on storefront glass restoration and shower door glass restoration before deciding it is a weekend job.
The honest self-check
Three questions. Does my nail catch? Can I afford to learn on this panel? Do I have the right machine and the patience to run every Step? Nail no, panel yes, machine yes — buy the kit. Nail yes — call instead.
Not sure which side of the line you are on? Take two photos — one straight on, one at a low angle with light raking across the surface — and text them to 818-356-1345. We will tell you honestly whether it is a kit job or ours, and which Step to start from if it is yours. More on what the service covers: glass scratch removal in Los Angeles.